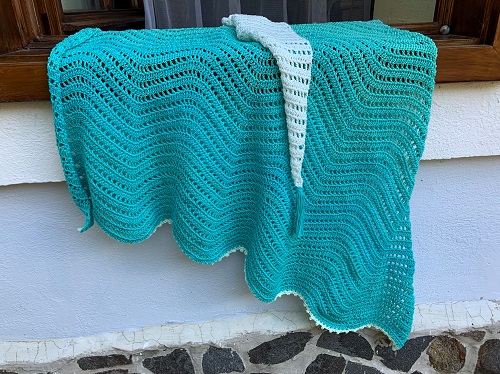
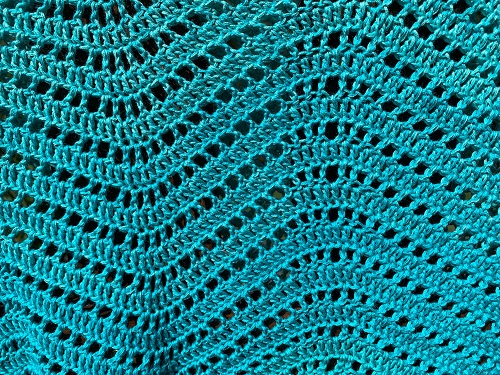
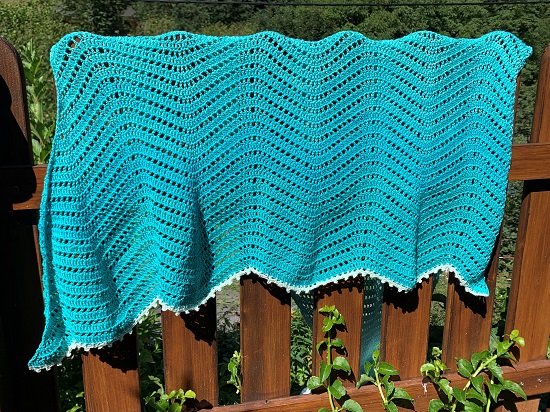
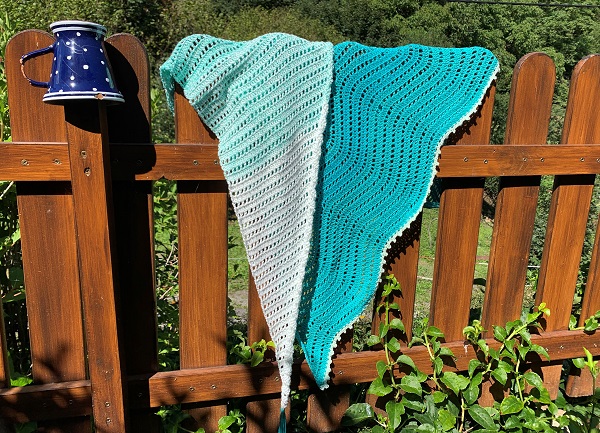
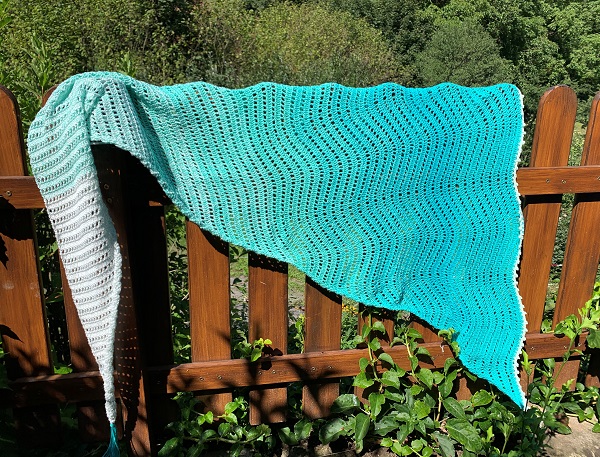
Crocheted scarf from yarn with ombre effect. The body of the scarf is crocheted with a pattern from double crochets. Lines with spaces and solid lines alternate. Straight lines are followed by wavy lines, where the waves seem to gradually get bigger.
Difficulty: medium
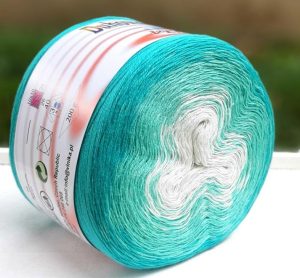
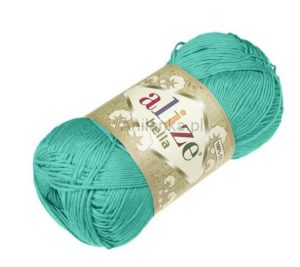
Material: yarn with an ombre effect (1 ball: Vlnika Rainbow fantasy 200 g 800 m – four thread, 50% cotton, 50% acrylic, 1 ball Alize Bella No. 477, the rest of a similar yarn in mint green (for the last row with dots).
Hook no. 3
Dimensions: 110 x 170 cm
Stitches (US terminology)
ch – chain
sc – single crochet
dc – double crochet
solid row (solid pattern) – row od dc
hole row (hole pattern) – row with dc and ch spaces
ss – slip stitch
picot – 3 ch, ss to 2 front loops of the stitch below the picot
Approach:
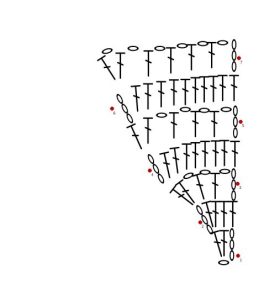
The scarf consists of 4 patterns. Straight one and 3 types of waves. The waves gradually increase in size. If you are not sure about the calculation, you can choose a simpler alternative – a straight pattern and waves 1. If you choose a complete pattern, you must pay attention to the exact location of the stitches so that the waves are nicely positioned one after another.
- Straight pattern
We start in the narrow corner and gradually add stitches on one side of the scarf
1.r.: 4 ch, 2 dc in 1st ch, turn,
2.r.: 3 ch (=1st dc here and in whole wrap), 2 dc to the 1st dc, dc to the end of the row (the last dc to the 2nd or 3rd row of the chain – depending on how you tight you work and how the edge will appear to you. I made the last dc on the straight side to the 2nd ch) (5dc)
3.r.: 4 ch (= 3ch + 1 ch), skip 1, dc, ch, skip 1, dc, ch, dc to the 3rd ch of previous row (4 dc and 3 ch spaces)
Adding one sitch each row
4.r. and every even row is a solid pattern: 3 ch, dc into the same stitch (added 1), dc into each stitch, dc into the 3rd ch of the previous row
5.r. and every odd row is a hole row. The hole row starts on the straight side. 4 ch, skip 1, (dc, ch, skip 1) repeat until the end of the row – to the last (3rd ch of the previous row) make 2 stitches – either ch, dc, or 2dc, as the pattern turns out)
Repeat rows 4 and 5 to a length of about 90 cm, last row is hole row.
Adding 1 dc in solid rows and 2 stitches in hole rows
6.r.: – as 4.r.
7.r.: 4 ch, skip 1, (dc, ch, skip 1) repeat until the end of the row – in the last stitch (3rd row of the previous row) make 3 stitches – either dc, ch, dc, or ch, 2dc, as the pattern turns out.
Repeat rows 6 and 7 until the length of the scarf is approx. 120 cm, last row is a solid row
- Wave pattern
Wave pattern 1 – adding on side: 1 double crochet in solid rows and 2 stitches in hole rows
We start with a hole row – from the straight side
Hole row W1.1:
Start: middle of top wave: 4ch, dc, ch, skip 1, dc, ch, dc, ch, skip 1,
down: (dc, ch, skip 1) x 4,
bottom wave: (dc, skip 1, dc, ch, skip 1) x 4, we reduce 4
up: (dc, ch, skip 1) x 4,
upper wave: (dc, ch, dc, skip 1) x 4, ch, we add 4
down: (dc, ch, skip 1) x 4
etc.
Repeat the phases of the wave until the end of the row. Add 2 stitches in each hole row at the end. We Make sure that you do not add more than necessary stitches in the hole rows, or do not reduce the stitch nr.
Solid row W1.2 – like r.4.
Finish waves 1 with a hole row.
After 10 cm from the beginning of Wave 1 pattern, start making the Wave 2 pattern.
Wave 2 pattern – adding 1 double crochet in solid rows and 2 stitches in hole rows, plus 4 stitches (in every repeat) in the first row of the Wave 2 pattern
Solid row: V2.1: as row 4, but in the upper wave we add 4 ds evenly
Hole row: V2.2:
Start middle of the top wave: 4ch, dc, ch, skip 1, dc, ch, dc, ch, skip 1,
down: (dc, ch, skip 1) x 5
bottom wave: (dc, skip 1, dc, ch, skip 1) x 4, we reduce 4
up: (dc, ch, skip 1) x 5,
upper wave: (dc, ch, dc, skip 1) x 4, ch, we add 4
down: (dc, ch, skip 1) x 5
Following solid rows V2.3: as line 4
We end the Waves 2 with a solid row.
After 15 cm from the beginning of the pattern of wave 2, start to make the Wave 3 pattern – you do not add stitches in the pattern, just the wave is made steeper, i.e. we add holes in the upper part of the wave and reduce the stitches in the lower part of the wave.
Wave 3 pattern – adding 1 double crochet in solid rows and 2 stitches in hole rows
Hole line: W3.1:
Beginning: middle of the upper wave: 4ch, (dc, ch) x 4,
down: (dc, ch, skip 1) x 5
bottom wave: (dc, skip 1) x 4, ch, skip 1, (dc, ch) x 4, skip 1, we reduce 6
up: (dc, ch, skip 1) x 5,
top wave: (dc, ch, dc skip 1) x 1, (dc, ch) x 5, skip 1, (dc, ch, dc, skip 1) x 1, ch, we add 6
down: (dc, ch, skip 1) x 5
V3.2 solid lines: as line 4
After finishing the rainbow yarn cake, connect the corresponding solid color and continue with the Wave 3 pattern to the desired length.
End the pattern with a solid row
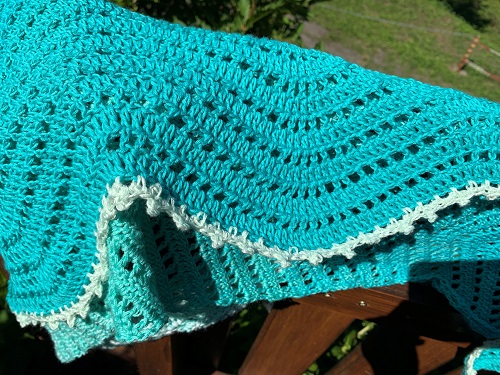
- Finishing row with picots
Choose which side will be right and which left. Start on the wrong side

1st row: sc, sc, (skip 1, dc) repeat to the end of the row, turn the work.
2nd row: sc at the beginning. Make all stitches to the ch 1 spaces from the previous row. (1st space: sc, picot, sc, 2nd space: sc) repeat until the end of the row except for 5 spaces on the upper wave, where instead of 1 sc make 2 sc so that the edge does not shrink.